Today, people are fond of downloading files instead of streaming videos online. There are a lot of software that can be used for this purpose but not all equally efficient and secure. Musify Music Downloader is a one-stop and versatile video downloader that can download and convert videos from 1000+ video sites including YouTube, Dailymotion, Vimeo, and all the big names. This Musify Music Downloader Guide will let you know that how you can download and make use of the software.
You can see the video to learn the software in detail.
How to Download and Install Musify Software
To download and convert videos with Musify downloader, first you need to install the software to your computer. The following are the detailed steps to download and install Musify software.
Step 1 Download the Latest Version of Musify
Musify Music Downloader offers a separate version for both windows and mac users. First of all, you have to download the relevant program according to the operating system of your computer. For your convenience, below are the downloading links for Musify software.
Step 2 Install Musify Music Downloader
After downloading the program, next you have to install the software to your computer. For this purpose, open the downloaded file and click on the Run Button.
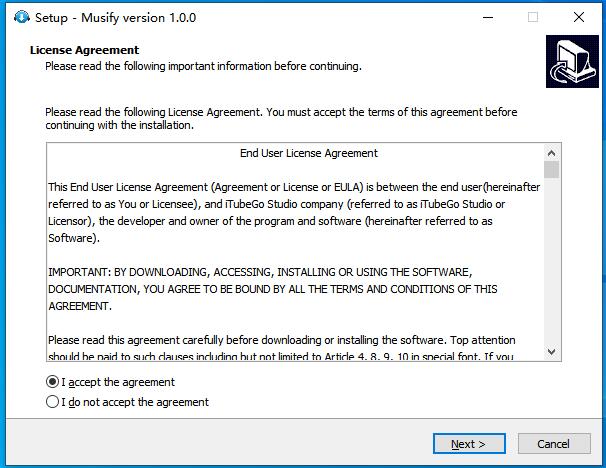
Then, you’ll be given a license agreement to review the important information regarding the software. Go through the License Agreement carefully and select the “I accept the agreement” option. After that, click the Next button.
Now, the system will allow you to select the destination location for the program. If the already selected location is suitable for you, simply click the Next button to proceed, otherwise, change the destination location before going to the next window.
In this step, you can select the additional tasks while installing Musify. If you want to “Create a desktop shortcut”, tick-mark the option and click the Next button.
Then, the program will start installing, and once it gets finished, click the Finish button to complete the setup wizard.
Step 3 Register and Update the Software
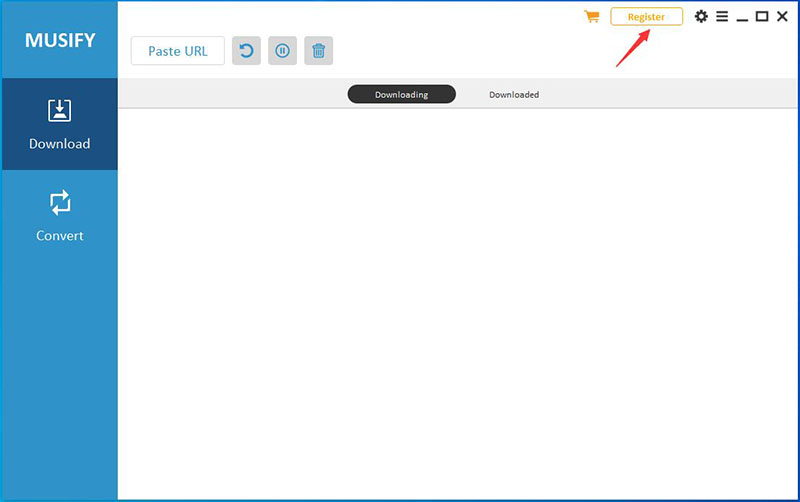
Once the installation gets completed, the Musify software will be opened automatically. Initially, you’ll be using the free trial version, but if you want to get unlimited access to the complete premium features of the software, then first you have to register your Account.
To access the software via your registered account, click the Register button located at the top of the interface. If you want to purchase the best suitable plan, then click the yellow-colored “Buy Now” button.
Or, if you’re already a registered user, then simply put the “Licensed Email” and “Registration Code” and click the Register button.
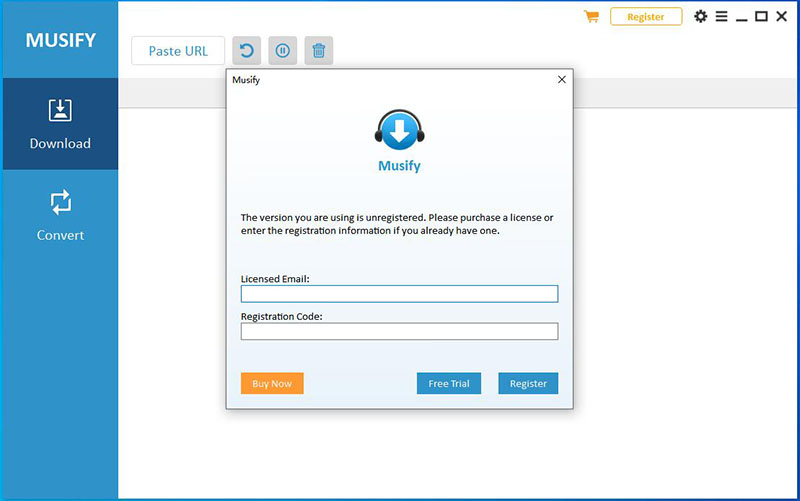
Note: We recommend you to copy and paste the Licensed Email and Registration Code, in order to avoid the typing mistakes.
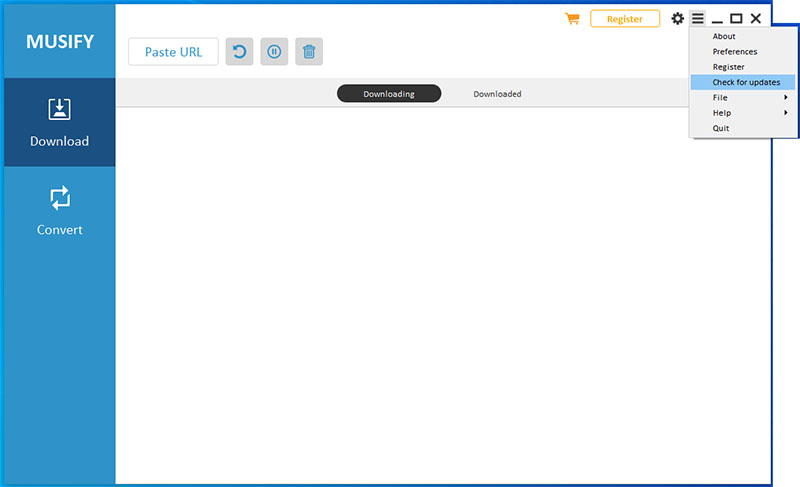
We always try improving the functionalities and features of the software, which are usually provided in the form of updates. Thus, it is recommended to use the latest version of the software. To get the latest version of the software, click the three-lined button and select “Check for updates”. In this way, you’ll be given the latest version to download, or if you’re already running the latest version, it will be notified to you.
How to Download and Convert Videos Using Musify
What makes this software particularly outstanding is that it can download and convert any music from more than 1000 online video and music sharing websites. When you launch the Musify software on your computer, you’ll see the two sections on the main interface i.e. Download and Convert.
To know how to use this program, you can refer to the detailed step-by-step guide of the different functions of Musify.
Note: If you have logged in to your Spotify account on the APP or Web, please sign out of it before you download Spotify songs.
1. How to Use the Musify Download Function
To download full music playlist from YouTube or any other online website using Download function of Musify, you need to follow these steps.
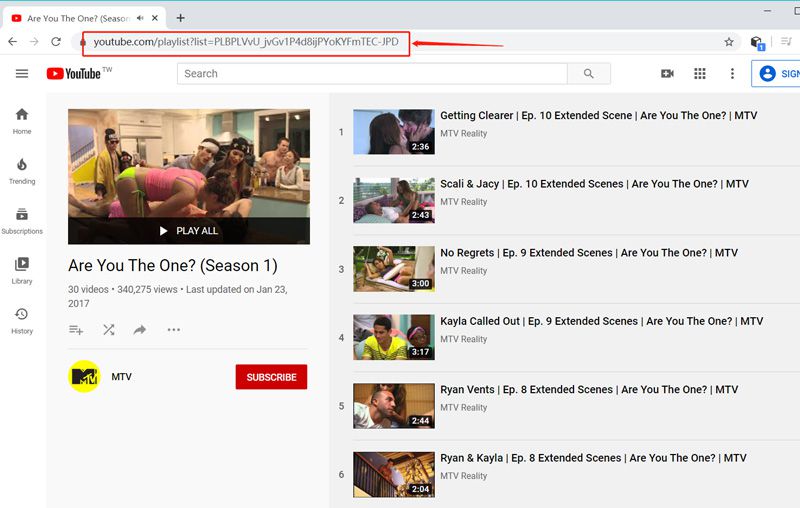
Step 1 Copy the Video/Audio URL from YouTube
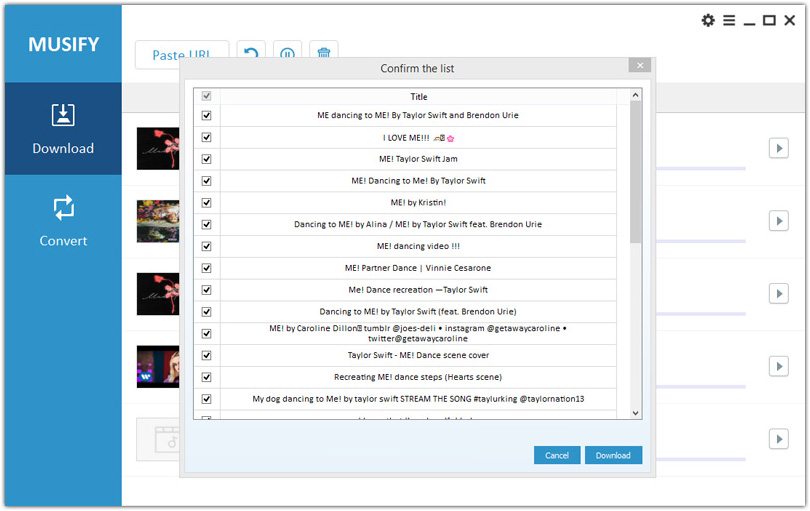
If you want to download the entire playlist from YouTube in mp3 format, then go to the YouTube website and look for the particular playlist that you want to download. Once you find the required video/audio playlist, copy its URL from the browser address bar.
Step 2 Setting the Download Options
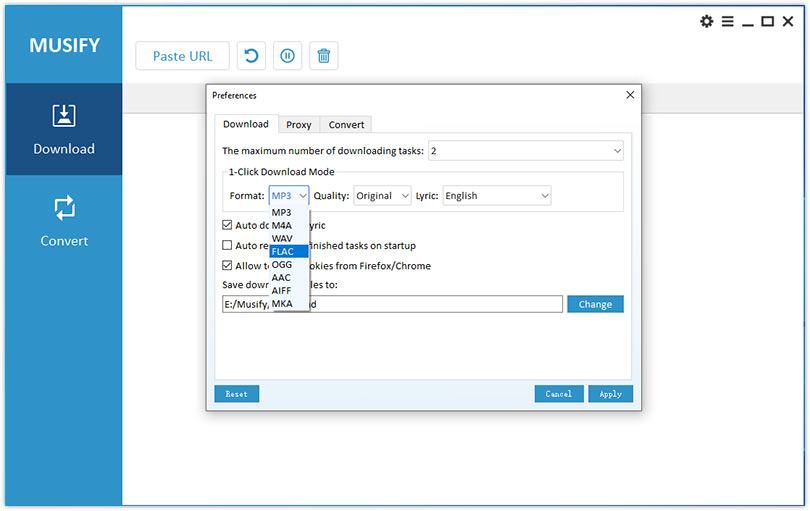
Open the Musify software. You have to select the settings before starting the downloading process. For this, press the three-lined button and go to the Preferences section. Here in the Download part, you can choose in between the different output formats i.e. MP3, M4A, and WAV. You can also set Downloading Quality, Lyric, and Destination Location in this step. After getting done with it, click the Apply button to save the selected settings.
Step 3 Paste the Copied URL
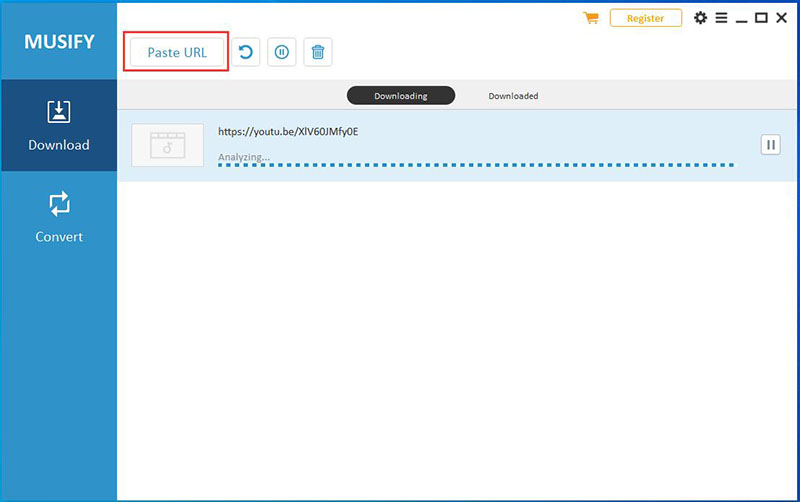
As we’ve already discussed, Musify supports music downloading from 1000+ online websites including Spotify, YouTube, Bandcamp Playlist, etc. After copying the video/audio playlist URL and selecting the settings, click the Paste URL button and it will start downloading the music in required output format and quality.
- Download Videos/Audios
- Download YouTube Playlist
Step 4 Download Audio File
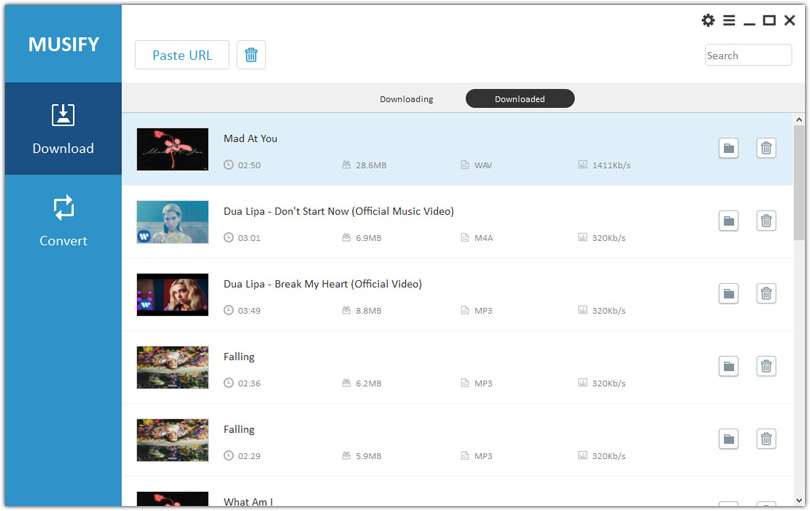
After the downloading process gets completed, the audio file will be saved to the selected location on the computer. You can also find the file with the audio format in the Downloaded Tab.
2. How to Use Musify Convert Function
Through its versatile music converter, Musify allows you to convert videos into various formats without losing original audio quality. It supports dozens of audio and video formats, and lets you convert video/audio to MP3, M4A, and WAV. To convert any video or audio file using the Convert function of Musify software, you have to follow the below-mentioned steps.
Step 1 Setting the Convert Options
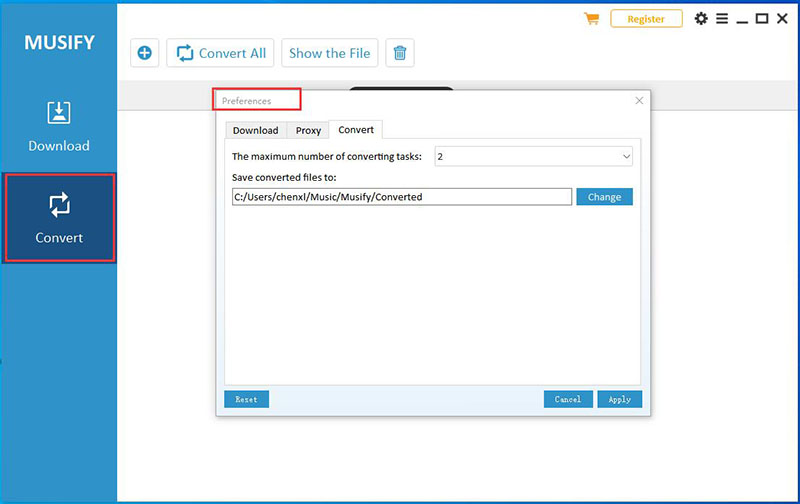
Select the Convert section of the main interface, and then, click the Three-Lined button located at the top right of the interface. Then, go to the Preferences to set the convert options. You can select Destination Location from the Convert Tab of the Preferences section.
Step 2 Add Audio/Video File
In the next step, click the “+” button to add to import the audio/video file from the computer.
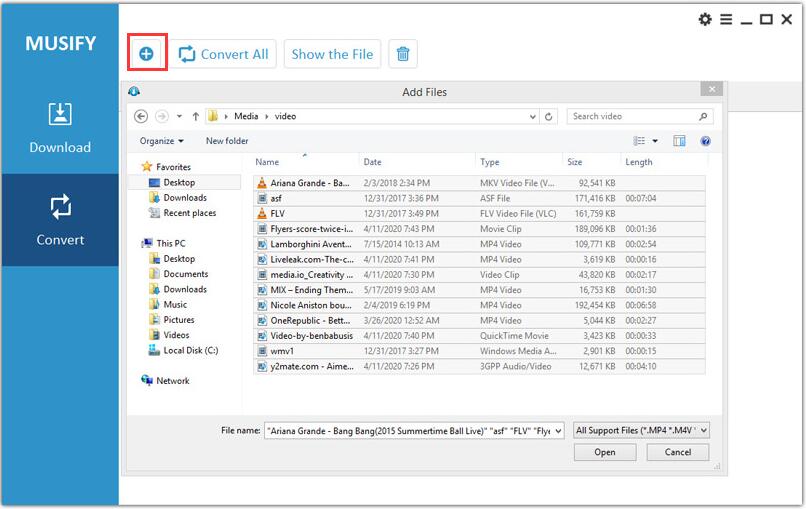
Step 3 Choose the Output Format and Quality
After adding the required video or audio file, click the “Convert” button, and then, a pop-up will appear. Here, you can choose the Output Format and Quality. You can choose the output formats from MP4, M4A, WAV, and you can choose qualities in between 64 kb/s, 128 kb/s, 256 kb/s, 320 kb/s, and Smart Fit. Then, click the OK button and the file will begin to convert.
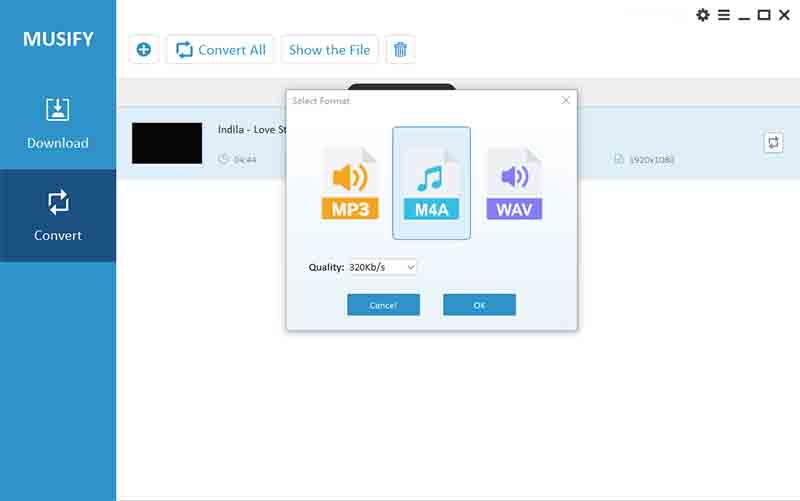
Step 4 Finishing the Conversion Process
After the conversion gets completed, the audio file will save to the destination location, or you can also find the file in the Converted Tab.
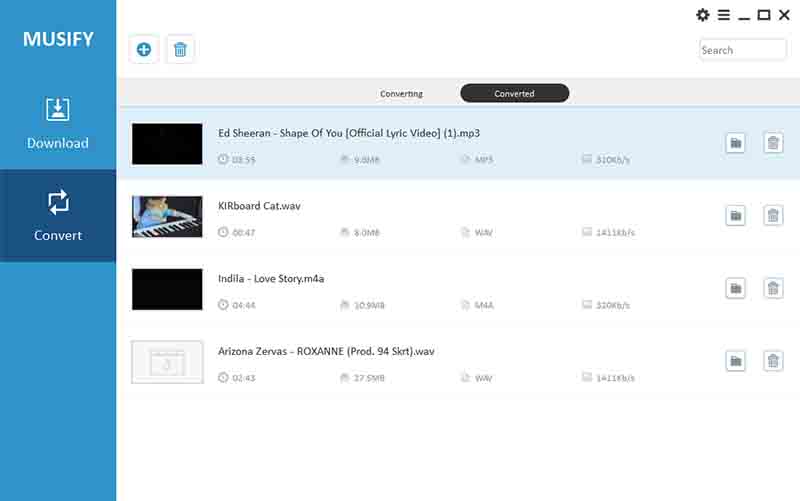
Note:
- You can click “Convert All” button to convert all files in batch.
- “Show the File” button let you find the destination location of the file.
Understanding the Basics
1. Preferences
There are 3 different Tabs of the Preferences section in Musify Music Converter. Below is the detailed description of these tabs.
1. Download Tab
In the Download Tab of Preferences section, you can make the following changings.
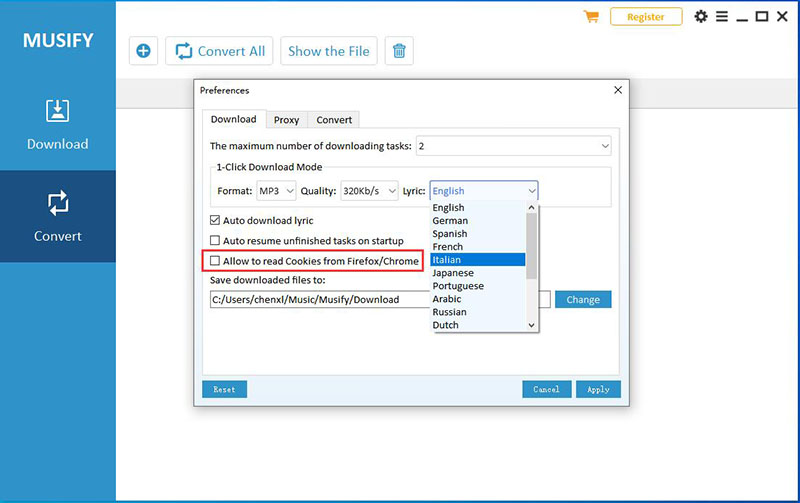
- You can set Output format, Quality, and Lyric here. The available output formats are MP3, M4A, and WAV, whereas, different quality options are 64 Kb/s, 128 Kb/s, 256 Kb/s, 320 Kb/s, and Smart Fit.
- You can limit the maximum number of downloading tasks in the Preferences section.
- You can also select or unselect “Auto download lyric” and “Auto resume unfinished tasks on startup”, depending upon your requirements.
- It is to note here that when you’re downloading private Facebook video, you have to select the “Allow to read Cookies from Firefox / Chrome” option.
Note: Since the Spotify updated and if you find the Musify music download cannot download or working about download Spotify song, please click the “Allow to read Cookies from Firefox / Chrome” option all the time to download all Spotify song, playlist, album.
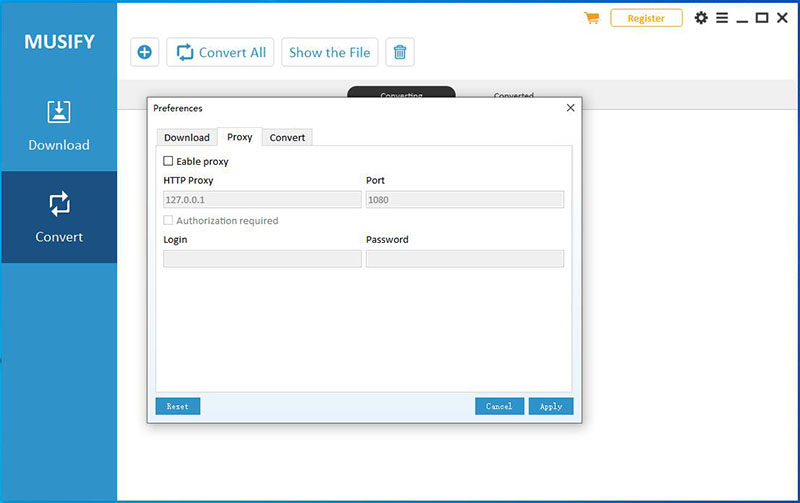
2. Proxy Tab
You can enable Proxy by putting the relevant data in the HTTP Proxy and Port fields. Here, you can also select or unselect the “Authorization required” option. If you select this option, you’ll have to enter the Login and Password in the given fields.
3. Convert Tab
In the Convert Tab of the Preferences section, you can set the maximum number of converting tasks and can also set the destination location in this tab.
2. Pausing or Resuming the Downloading Files
Musify Music Downloader allows you to Pause the downloading or conversion procedure by click the Pause button. And if you want to resume the procedure, all you have to do is to click the Resume button, and the downloading procedure will start again from the same point where it stopped.
3. Manage All Downloaded Media
You can access and manage all the downloaded media files remaining within the software. In the Download section, you can find and manage all the downloaded files in the Downloaded tab. Likewise; you can access and manage all the previously converted files in the Converted tab of the Convert section.
Support Input File Formats
| Video | MP4, M4V, 3GP, MPEG, DAT, AVI, ASF, WMV, VOB, MKV, FLV, 3GS, 3G2, F4V, WEBM, TS, RMVB, MOV |
| Audio | MP3, AAC, AC3, FLAC, M4A, WAV, WMA, AMR, MKA, MP2, AIF, AU, AIFF, CAF, OGG, RAM, RA, M4B, M4R, APE, OPUS, WEBM |
Support Output File Formats
| Audio | M4A, MP3, WAV |
| Audio Quality | 320 kbps, 256 kbps, 128 kbps, 64 kbps |
Conclusion
In this Musify Music Downloader Guide, you have come to know about the usability and unique features of Musify Software. After going through this guide to Music Downloader, now you’ll be able to use this program more efficiently. If you still have any queries or want to know anything about our software, simply leave a message in the comments section or email us at [email protected], and we’ll promptly reply to you.
fail on all dowloads lately whats happening
Dear Customer,
You can send your error screenshot and log folder to our support at [email protected]. We will help you.
para poder comprar mustify, necesito comprobar que en realidad descargue la letra de las canciones, en la prueba gratuita no descarga la letra. si me pueden colaborar se los agradecería
sí, en la versión de actualización, puedes descargar la letra de la canción.
not downlaoding all coming up as fail can u plz tell me why
Dear,
Please send your error screenshots to our support at [email protected], we will help you.
I don’t follow this how it works
Dear,
You can watch the video guide to learn how.
Is there a way to download without converting?
If not can you add it?
spotify downloads with flac dont come with the songs details only the name
Hi,
Please send the music link you want to download to [email protected], Our support team will help you.
It does not explain how to convert spotify files at all!
Dear Customer,
If you want to download Spotify music by using Musify, you can see this post: https://itubego.com/spotify/how-to-download-music-from-spotify-to-computer/, thanks
just bought it – not very good
most downloads fail
Dear Customer,
If you have any problem with the software, please send an email to [email protected]. We will help you.
wow, I get you, very funny, shove your program up your ass please xDD
Tem falhado todos os downloads.
Vocês vendem um produto cheio de falhas.
Podiam colocar a tradução para Português Brasil.
As tags, capa do álbum e letras não estão baixando.
Favor corrigir.
Dear Customer,
If you have any problem with the software, please send an email to [email protected]. We will help you.
Not sure what these folks are complaining about. This program is amazing, works superbly with Spotify and youtube music, among other services. Musify along with MusicBrainz Picard to clean up metadata, and you’re all set for maintaining your library. A+++ work my friend, thank you
Does the program run own MacOs Big Sur 11.6? I haven’t done my software update yet because I’m not sure if Musify will still run after I update
Dear Customer,
The Musify Music Downloader can run on the MacOs Big Sur 11.6, thanks.
Hello.
Payed for the full version. Downloaded a playlist from spotify. It worked great.
Tried to dowload another playlist and the first 3 songs was fine but the rest was not. It was like from a radiostation or something and the filesize was way of. A 4 minute song in 50mb not around 4mb as expected. Tryed a single song whit the same result.
Werry disapointed buyer
Dear Customer,
If you have any problem with the software, please send an email to [email protected]. We will help you.
When I download from Spotify playlist on Mac there is no song information except the name of the song.
Dear Customer,
If you have any problem with the software, please send an email to [email protected]. We will help you
Hi, it is normal that in the free trial the songs download incomplete?? The time of the song is of 3 minutes and the soft download 1 min.
Dear Customer,
Sorry for the inconvenience caused to you, and yes, the trial version only has 1/3 conversion for one song.