
Presently there is a wide range of software and methods available in the market to edit WAV tags, but you can’t blindly trust every tool that claims to do the job. Basically, they’re designed to edit wav files and their metadata information that includes the title, artist name, album, release year, etc.
But in reality, all these programs are not helpful to fulfill all your editing requirements. For instance, if you have a large collection music tracks and need to edit tag information for them all simultaneously, what will you do then? Don’t worry, we will tell you 3 of the most convenient methods to edit wav metadata information on your computer.
Method 1: How to Edit the WAV File with Windows File Explorer
Thinking of editing wav tags, there are many options available for you, including various dedicated programs. But first, let’s discuss how you can use windows built-in file explorer to edit the metadata of WAV files.
Although, window tagging capabilities won’t be advanced in this method, but still, they are useful for standard editing and adding wav tags. Editing wav metadata in windows is as easy as counting your fingers. Just follow the below-mentioned steps.
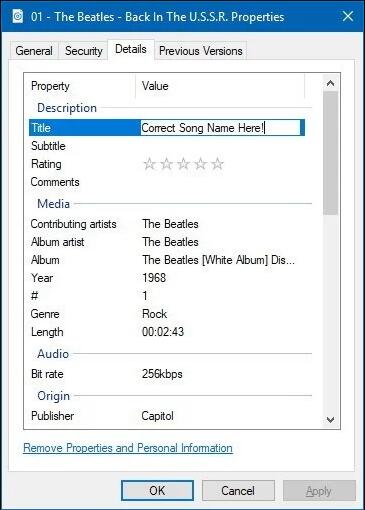
Step 1 Launch Windows File Explorer on Your Computer
Press Windows + E and open the window explorer. Then, choose the wav file for which you want to add, remove, or edit wav tags.
Step 2 Head Over to the Properties
Moving on, right-click the file, and at the bottom of options, you will find “Properties”. Click on the properties option and a new window will be opened.

Step 3 Go to Details Tab
In the resulting dialogue box, click on “Details” and you will find all the tags of that particular file.
Step 4 Apply and Save the Updated Metadata Information
Then, you can add or edit WAV tags in the respective fields, and here you go; now you have your tags edited for the file. In the last, click Apply and OK buttons respectively. And that’s it; your file with new tags is now saved.
Note:You can use the window explorer tag mapping option to discover whether the values you have changed end up in the files or not.
Method 2: How to Add Tags to WAV Files through iTunes
If you’re a Mac user, then you must be very much familiar with the iTunes. But do you know that you use iTunes to WAV files? Yes, that’s right! You can use iTunes on your computer to manually edit WAV metadata information.
You just have to follow these simple 3 steps edit metadata tags of WAV files using the iTunes program.
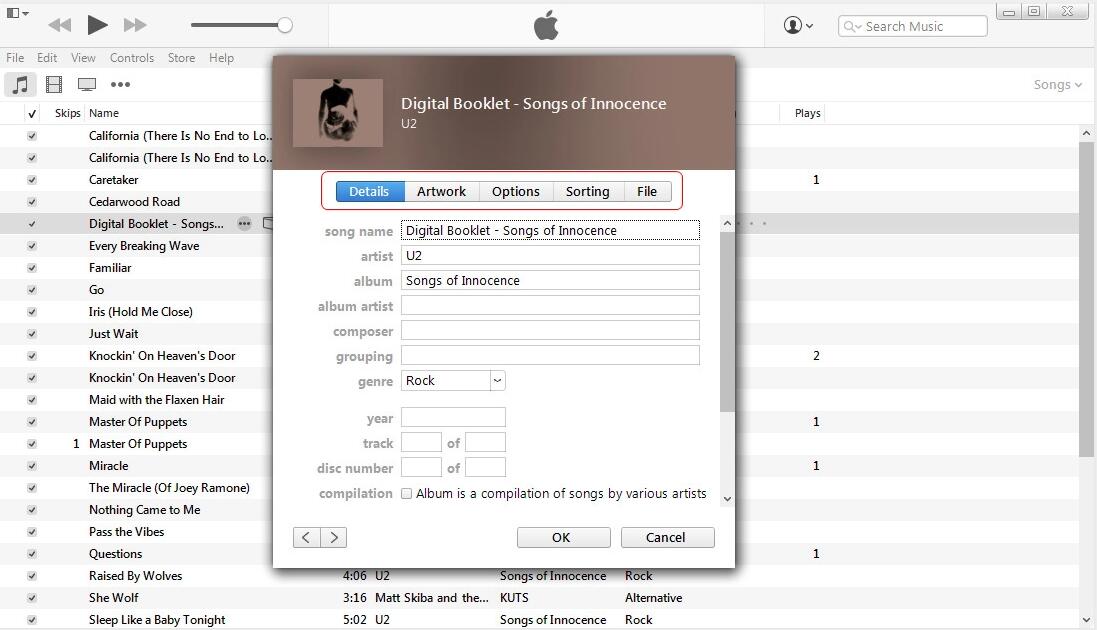
Step 1 Open iTunes and Import the WAV Files
Open iTunes and go to Preferences and General tabs respectively. Now, select the playlist, and then, drag and drop the WAV files from the destination location on your computer to the iTunes already opened window.
Step 2 Review the Tags
After uploading the WAV files to iTunes, tap “Command-I” and it will start displaying the metadata fields.
Step 3 Edit and Save the Changes
In this step, you can add the metadata information in the respective fields, and once you’re done with all the editing, click the “OK” button to save the modified WAV tags.
Method 3: How to Edit WAV Tags in Batch with TidyTag
Overall, every wav tag editing method is safe, secure, and convenient. But if you have an extensive music library and want to edit multiple files’ tags simultaneously, you must opt TidyTag – the ultimate and most comprehensive WAV tags editor. With TidyTag wav metadata editor, you don’t have to worry about the file’s complexities and size. Now, you can organize your music libraries as you want.
Key Features
- Whenever you import a WAV file, TidyTag will automatically suggest you and displays the corresponding tags. The batch process function further makes the process easier by processing all missing and incorrect tags at one time.
- It helps you to have a clean and well-sorted music collection by moving the files to separate folders and providing the option to rename the files according to the metadata information.
- Duplicate audio files occupy a lot of space on a hard drive. TidyTag automatically filter out the songs with the same path and helps you delete the duplicates from your music collection manually.
- The TidyTag comes with a built-in music player so that you can use the next level playback options remaining within the software. And the playlist manager let you keep your music collections organized.
- Simply add or drag the audio file into the tidy tag from iTunes. It won’t require any hectic conversion.
- In addition to WAV, TidyTag is compatible with almost all popular audio formats such as MP3, AIFF, M4A, AIF, and many more. That’s not all; it also supports all types of metadata formats.
How to Batch Edit WAV Metadata using TidyTag Software
Step 1 Download and Install TidyTag WAV Tag Editor
To start batch editing the ID3 tags for WAV files, first you’ll have to install the TidyTag Music Tag Editor on your computer. For that, you can download the installation file of software from the official webpage, and then, install the software on your computer using the installation file.
Step 2 Add WAV Files to TidyTag
Now, open the TidyTag music tag editor and click the “Add music file” button to add the WAV files. Clicking that button will open your desktop’s music library, and you need to browse and add all the WAV files that you want edit using TidyTag.
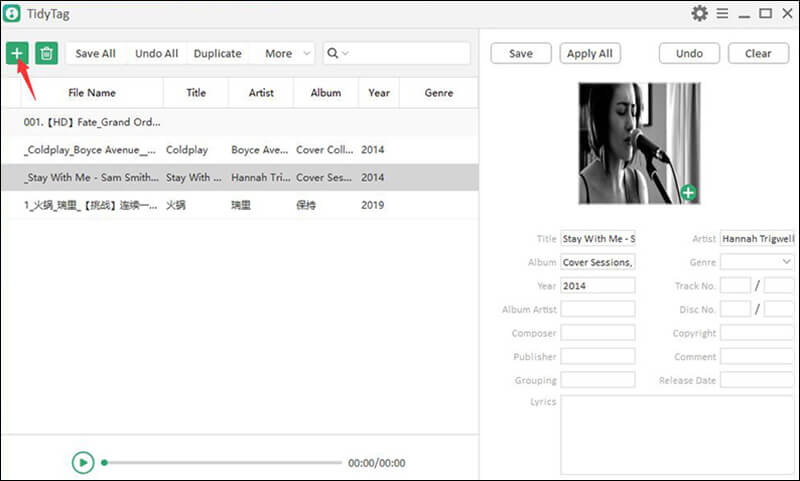
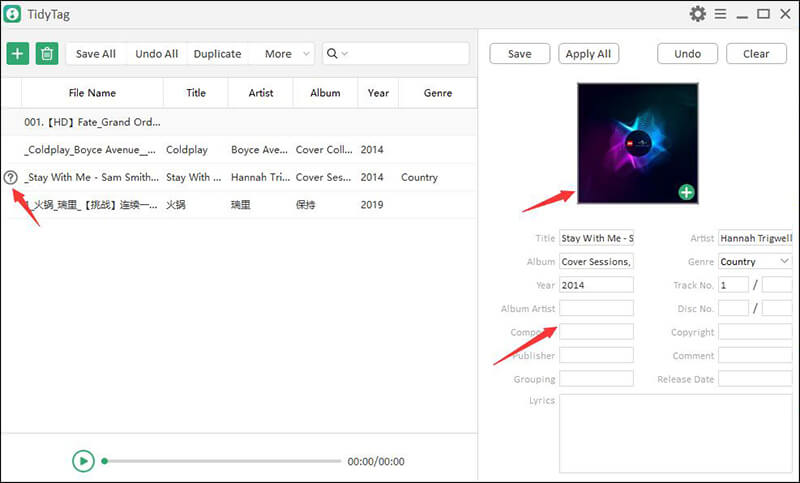
Step 3 Select the Specific File and Analyze the Tags
After uploading the files to TidyTag software, select the file from the list of files shown on the left side of the screen. When you’ve selected the file, the program will automatically start previewing the corresponding tags for the file.
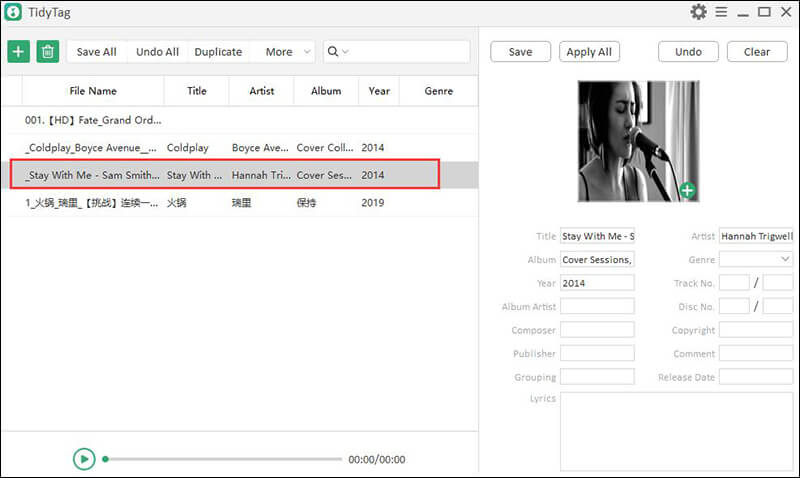
Step 4 Add or Edit Metadata Tags
In this step, you can add the missing tags or modify the incorrect tags. To do that, click on the particular tag text field and add or edit the metadata information manually. It should be noted here that if you’re going to batch process all the WAV files, then the modification made in the first file will be made to the all files in the list. So, edit the metadata tags accordingly.
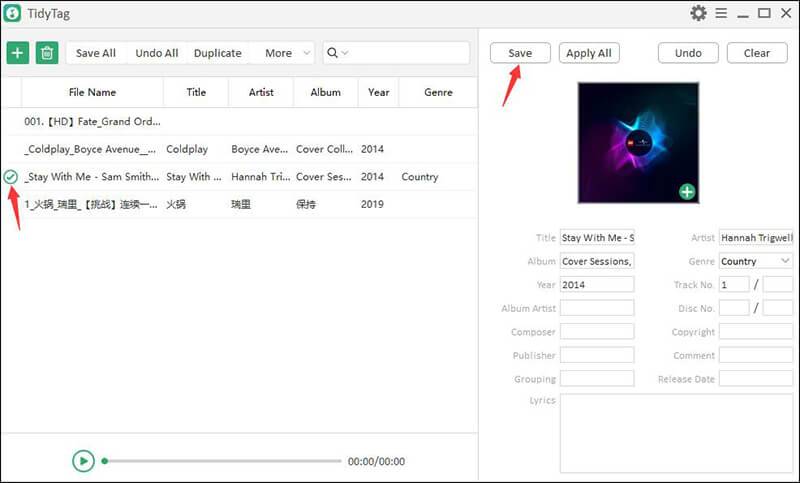
Step 5 Save the Files with Updated Tags
Once you’ve reviewed the tags and made the required modifications, click the “Apply All” button and the same selected ID3 tags of WAV file will be applied to the all files in the same batch.
Conclusion
All these methods provide advanced and productive solutions to edit WAV files, more specifically WAV metadata. Nevertheless, the TidyTag provides the most intuitive solution to complexities in managing audio tracks. Furthermore, it removes duplicity and helps you to modify the ID3 tags in the most efficient manner.